
How It’s Made
StoneWear Ceramics Wedding Dress Replicas
So many questions come my way regarding how I make my gowns. I’d like to share some of the key materials and main steps used to create these special stoneware replicas. Please keep in mind that every wedding dress presents its own, unique set of details and intricacies that all require research, a bit of exploring, and different techniques. With every clay sculpture and bridal gown, I learn more and my process evolves — which is one reason why I love creating. I never stop learning, and there’s always something new to discover.
My Main Material
Stoneware Clay
What’s so special about stoneware?
Each StoneWear wedding gown begins as a slab of stoneware clay, and it’s the special properties of stoneware that make these sculptures so strong despite their delicate details and flowing designs.
Stoneware is a durable, dense type of clay that has a texture similar to rock or stone when fired. It is less porous than other other clays, such as earthenware or other low-to-mid-fire clay bodies, which means that stoneware is naturally waterproof and can withstand higher temperatures. It is a versatile, high-quality material that lasts, making it an ideal material for ceramic art, sculpture, and pottery. Stoneware clay has become the star ingredient (and namesake) of StoneWear Ceramics’ custom wedding dress replicas.


Bringing Your StoneWear Gown To Life
Armature Selection
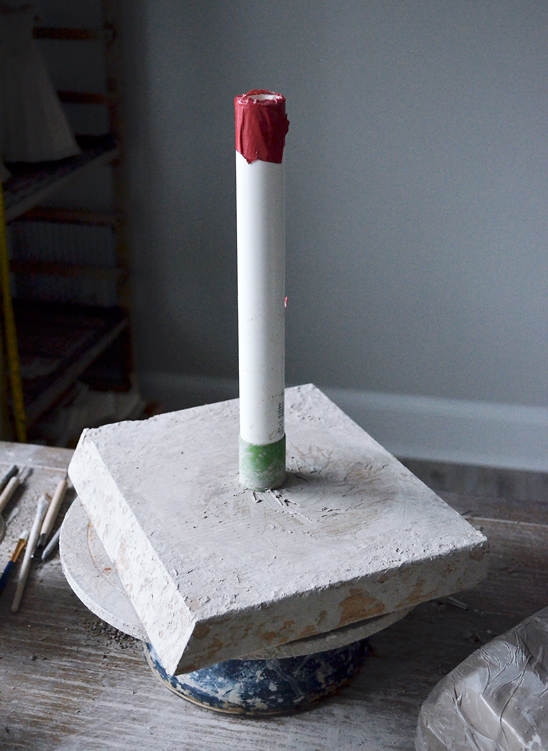
Depending on the gown shape and silhouette, I must first select and adjust an armature (internal frame) to support the sculpture as it is built and while it dries. Stoneware clay holds a lot of moisture, and because of that, it cannot support itself it dries out.
I’ve built my own collection of armatures that correspond to different wedding dress styles; mermaid, a-line, ballgown, etc. I build these armatures from various materials, ranging from PVC piping to custom, 3D printed cones.
Sculpting Stoneware
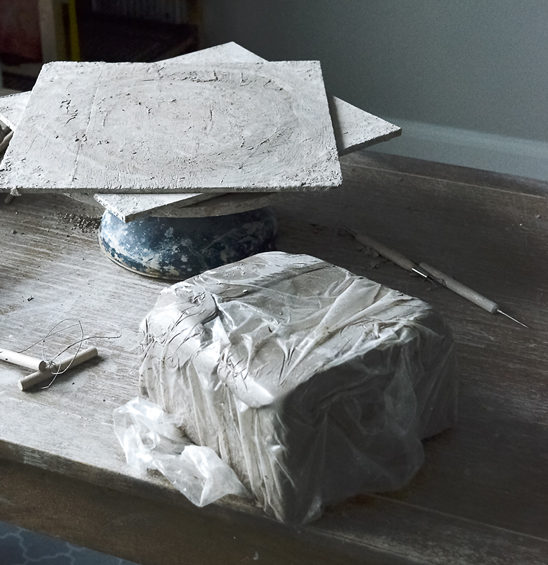
Believe it or not, your beautiful StoneWear Ceramics gown begins as big block of clay!
My stoneware clay comes in large blocks (wrapped in plastic packaging to keep the clay from drying out and solidifying). From this stoneware block, I pull and form slabs (rolled-out, flat pieces of clay) and begin sculpting around my armature which is really just PVC piping.
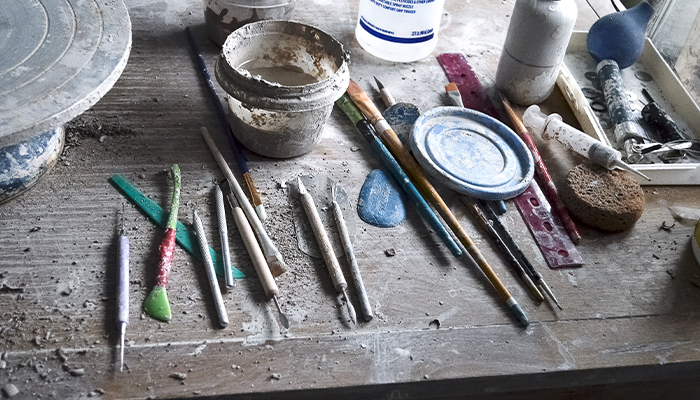
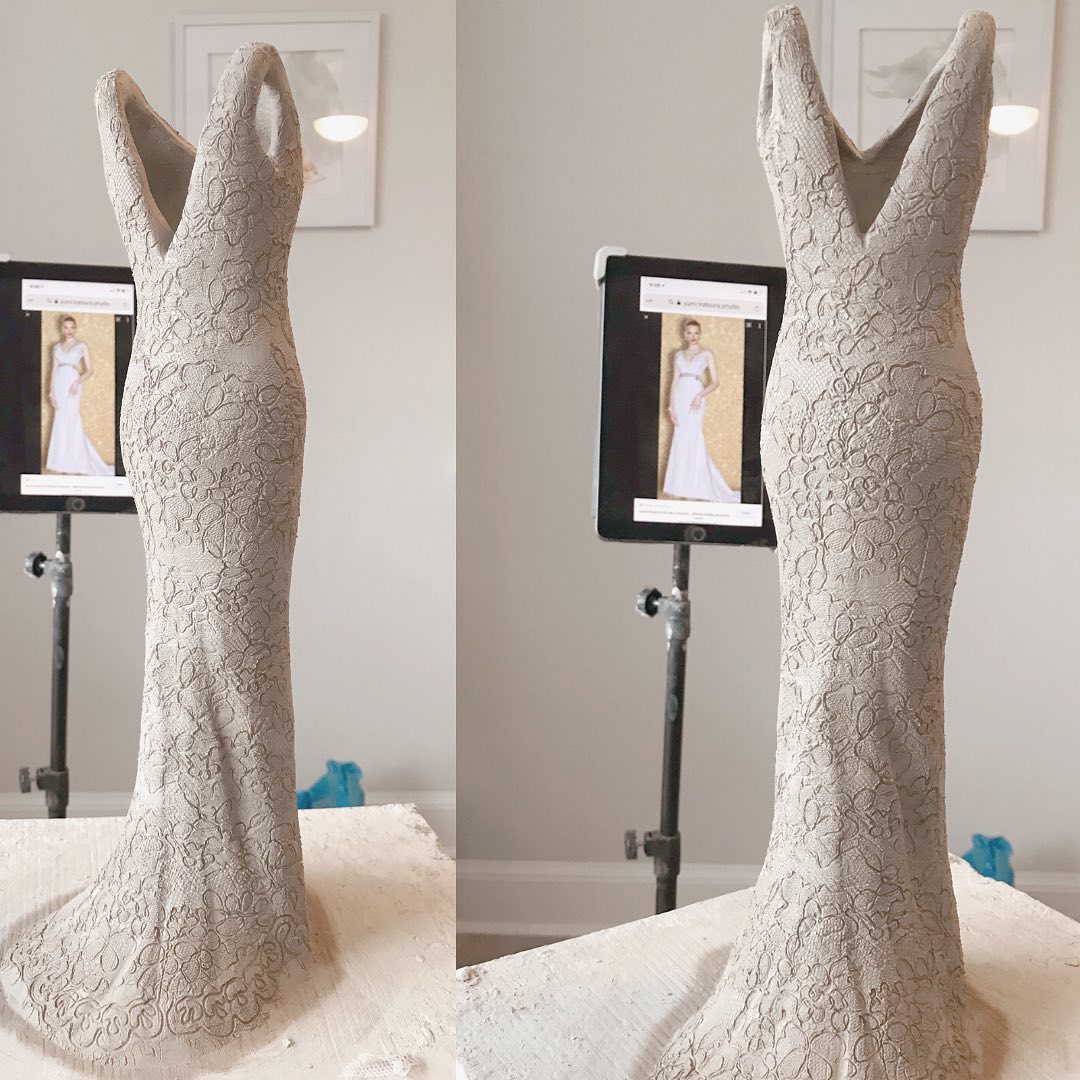
At this point, it takes me anywhere from 15-18 hours to hand-sculpt the clay into a foundational form. When the clay’s moisture level is at the optimal state for manipulation, I add textural elements such as lace, add any hand-carved details, and incorporate any other impressions.
Depending on the design, lace is intricately cut and arranged to replicate the original design of the gown. Pieces cut and placed can be less than 1/8” wide, so tiny I can’t sneeze or they may disappear!
Once lace is laid on the form, I use my magic tool and gently press the lace into the clay to create texture. Also at this stage, I add sleeves, folds, straps, and any other small details that inform the identity of the dress. It’s a time-intensive process to get the everything just right, but so worth it!
Drying Time
Stoneware clay must dry slowly and carefully. Once fully sculpted, the ceramic gown sculptures are covered with plastic and slowly dry over a period of at least 2 weeks. During this time, I make small adjustments to the details of each gown as the clay moves through different stages of the drying process and begins to solidify.
As the water evaporates, the clay becomes drier, at which point I add any hand-carved elements, create texture, and continue refining the gown. This stage requires time, patience, and a steady hand. As the clay dries, it becomes delicate and fragile. If rushed, the clay can crack and easily break.


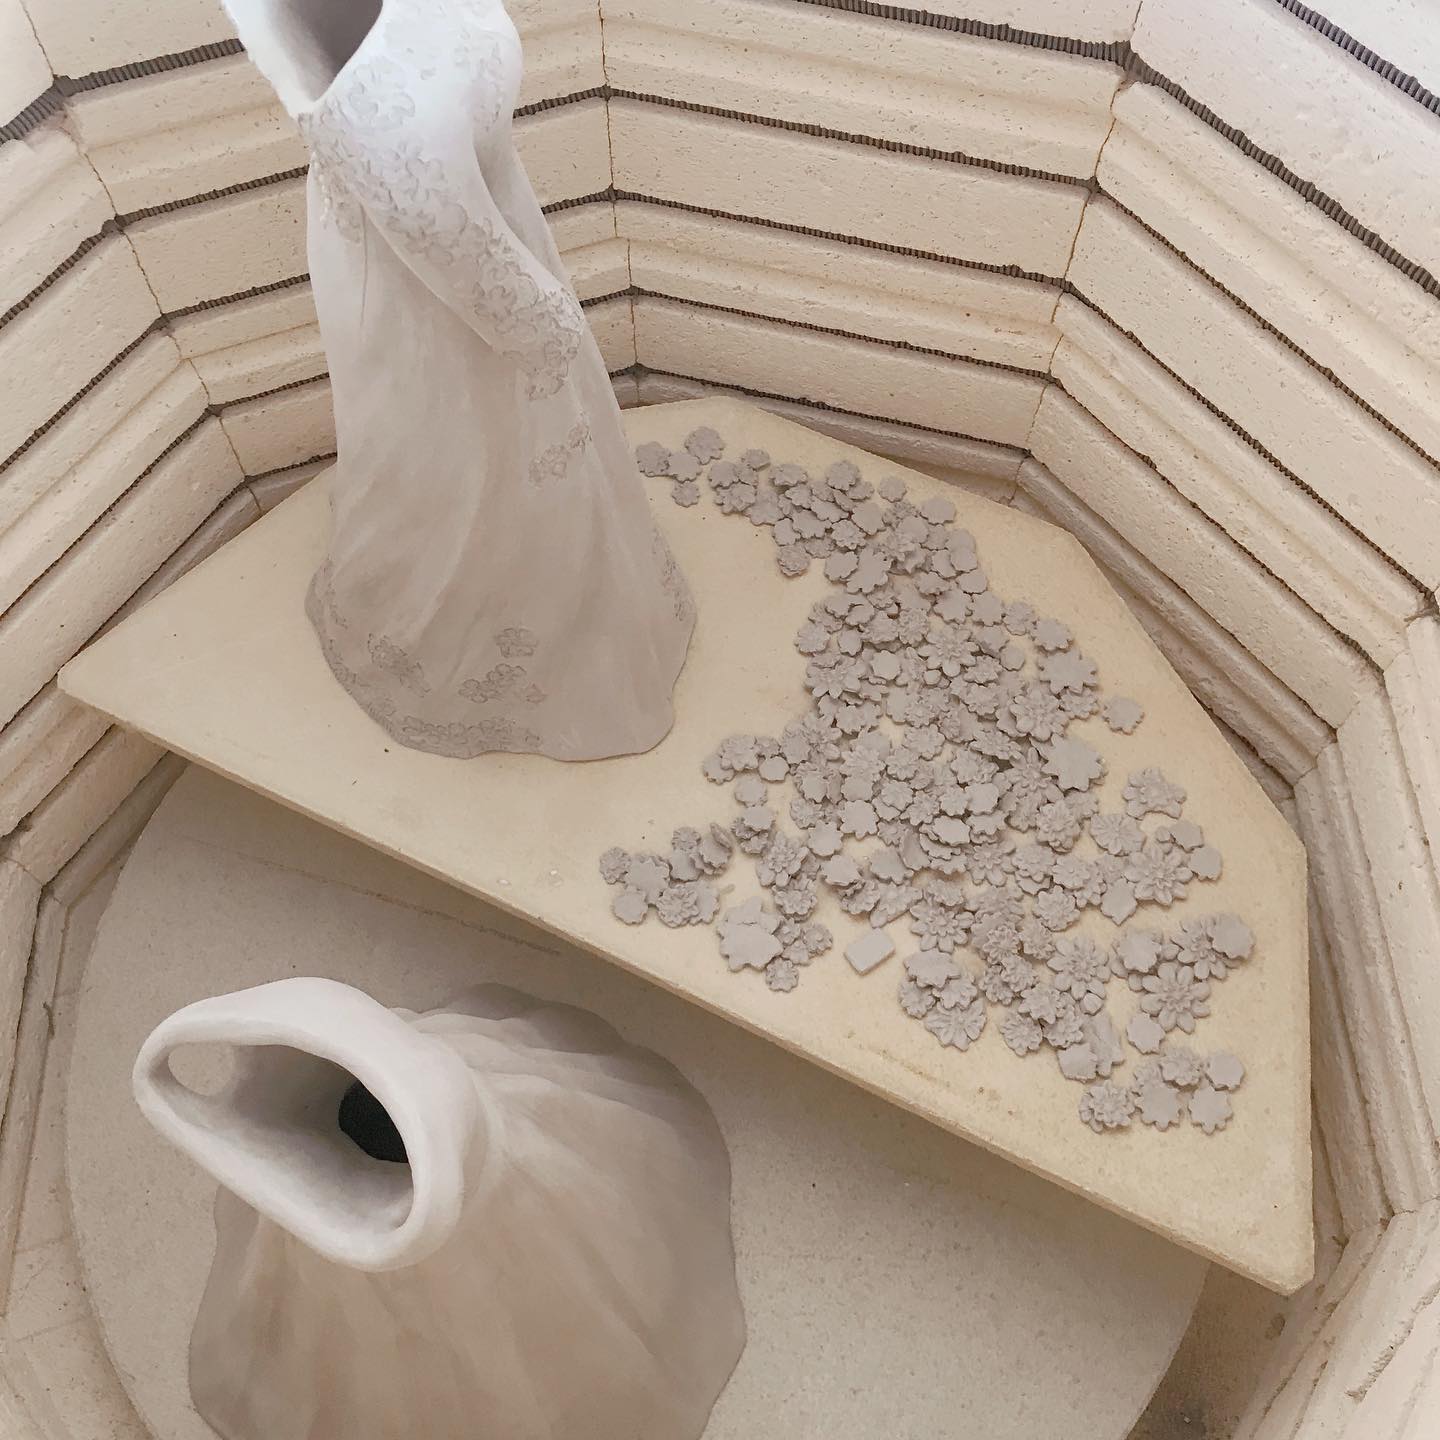
Stoneware Bisque Fire
Once the clay has dried over for at least 2 weeks, I place the gowns into the kiln for their first firing.
This process takes about 48 hours. During this stage, the clay bakes low and slow for the first 12 hours (the temperature is below boiling point). This step is called “candling,” and it ensures that any remaining moisture within the clay completely dries before the actual bisque firing process.
If any moisture remains within the clay during a bisque fire, it evaporates before the clay can fully set, creating a weak point or air pocket. While they may be invisible to the naked eye, these tiny gaps weaken the integrity of the entire sculpt, causing significant and irreparable cracks and breaks.
After the 12 hours of candling, the bisque firing begins. The kiln cycles through a set of three temperatures, from low to high, over a period of 12 hours, slowly firing and strengthening the stoneware clay. The kiln then takes another 12 hours to cool down before it can be opened. Once opened, the gowns are now hardened and ready for glazing.


Ceramic Glaze
After the gowns are bisque fired, I begin the glazing process. First, I clean each gown before applying the glaze, to ensure a smooth and even coat. Glaze consists of three basic components:
- Glass-forming substances (usually silica or boron trioxide)
- Refractory or hardening elements (alumina — this strengthens the bond between the glaze and the ceramic piece)
- Flux (such as bone ash, iron, zinc, sodium, etc. — which reduces the melting temperature of the glass-forming component)
Other additives, such as colorants, opalescence, and opacifiers are combined with these basic components to determine glaze color and opacity, and create other desired finishes.
Each ceramic wedding dress receives both an underglaze and glaze, and require at least three coats of each. Depending on your gown’s color and fabric type, I’ll normally run a few test tiles through the kiln to ensure a finish that is as true to the original dress as possible. Any glaze testing must happen before glazing the actual sculpture.
Glazing can be another tricky process, as too much glaze can cause cracking, and too little can cause streaking. Once I glaze each gown (which takes another 3-4 hours), they return to the kiln, again, to bake for another 24 hours.
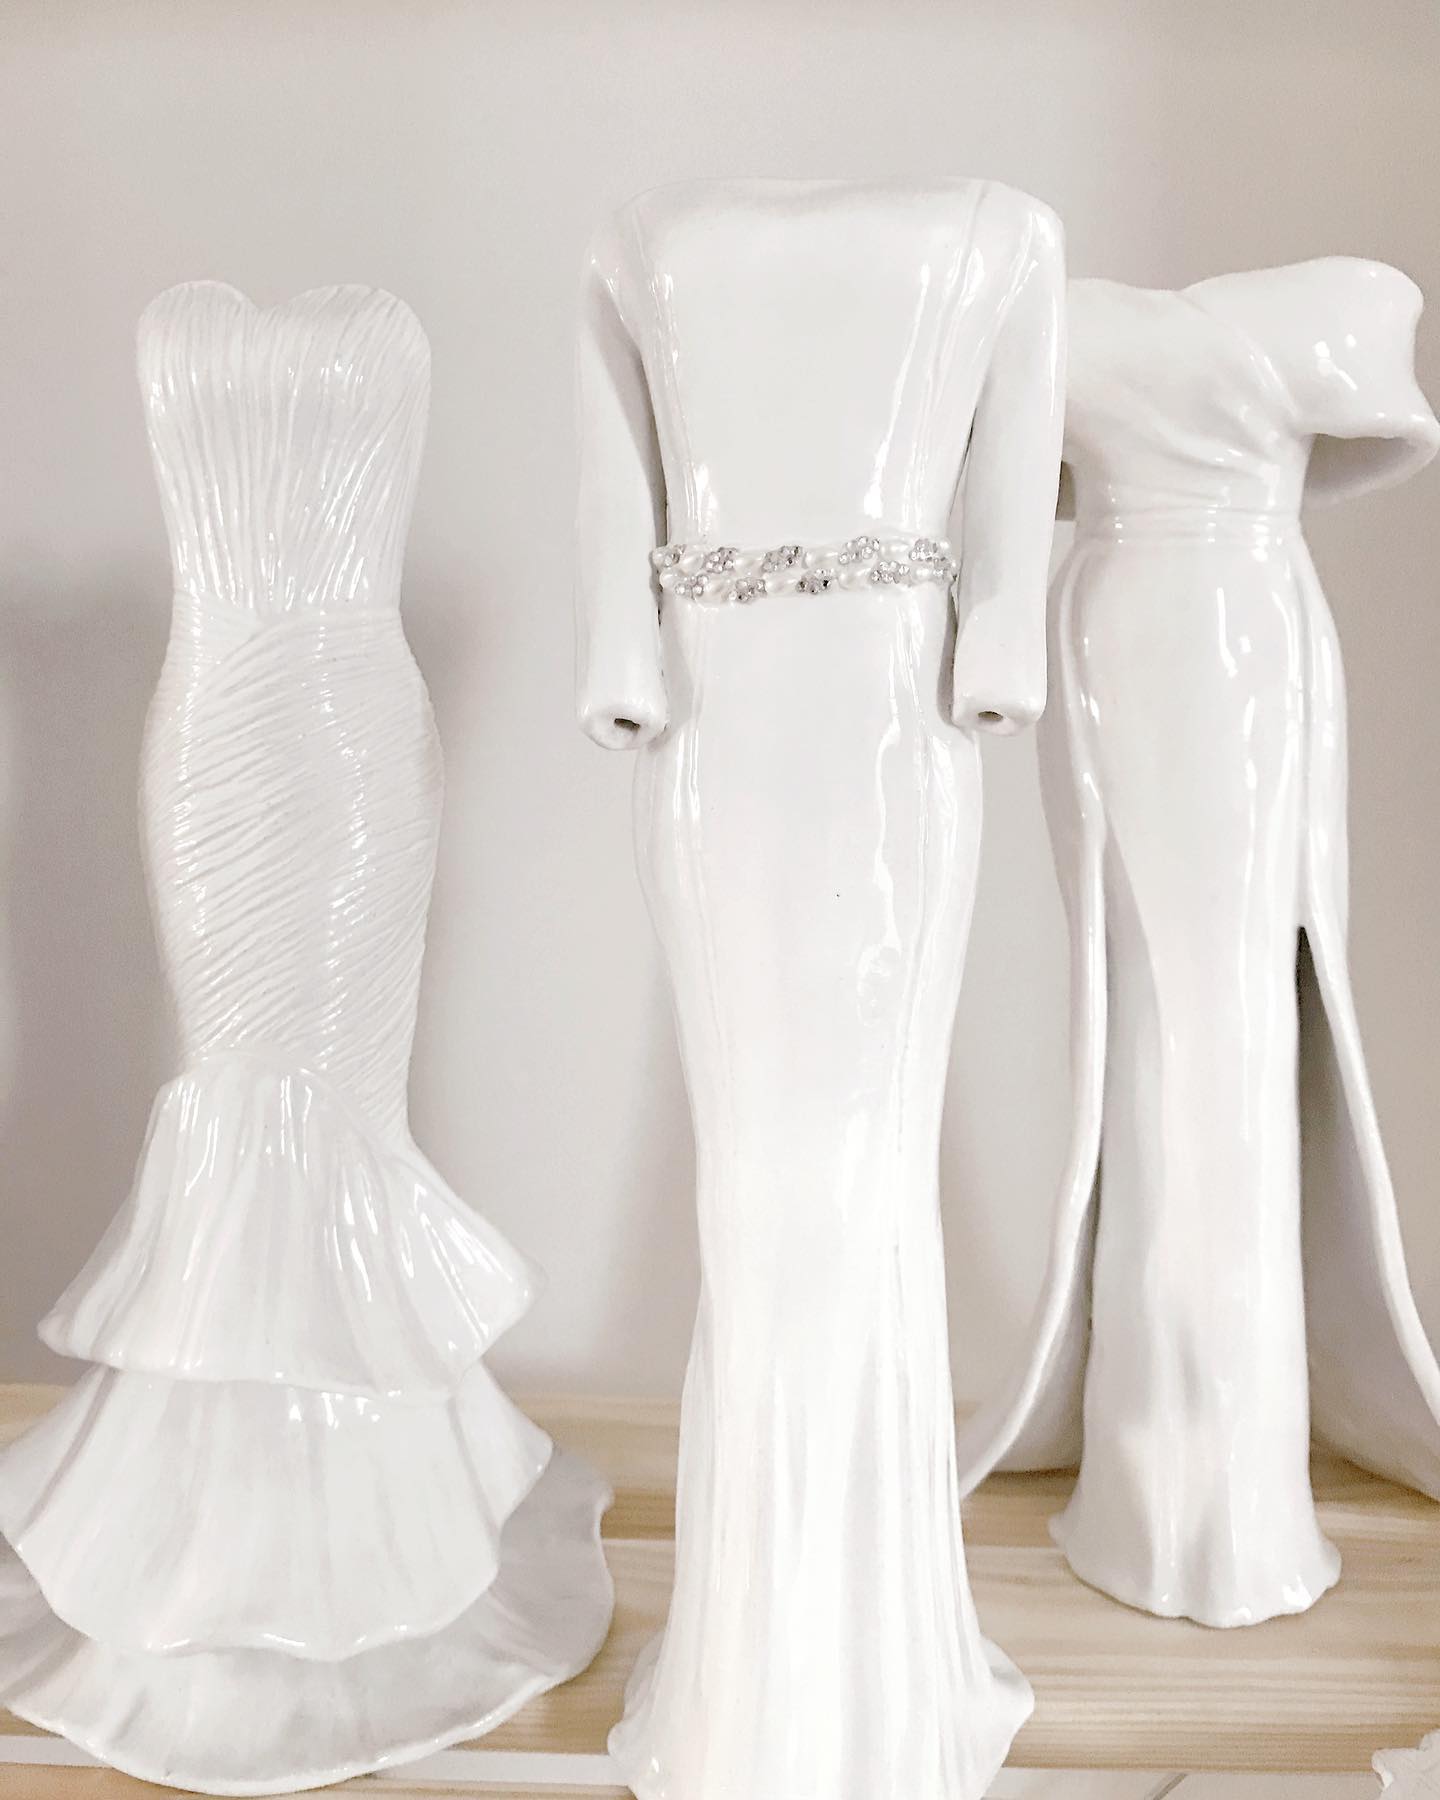


Finishes & Details
After sculpting, drying, bisque-firing, and glazing your ceramic dress, the next steps take some experimentation and careful research. Each gown requires different finishing techniques to achieve the “look” of the original wedding dress — whether that means beading, sequins, rhinestones, embroidery, etc.
With additional time and sincere care, I replicate the special details of each dress to highlight the impact, personality, and beauty of the original design. This can take an additional 5-10 hours to perfect, but in that time, I strive to capture the qualities of your gown that you fell in love with from the start.
As you can guess, achieving accurately-scaled representations of different fabrics, layering, embroidery, appliqué techniques, and beading details for these ceramic dresses requires access to variety of finishes and materials. Some of these include:
High-fire ceramic glazes
Since stoneware is a high-fire clay and requires significant heat to fully set (between 2150 and 2330 degrees Fahrenheit), glazes used to add color, texture, depth, and shine should be able to withstand these temperatures as well.
High-fire underglazes
To create the look of layered fabrics and delicate lace, applying a base layer of underglaze retains the detail of intricate patterns and hand-carved details, allowing them to show through the top layer of glaze without loss of quality.
Clay slip
Clay slip is a liquified clay slurry, nearly the texture of a thick paste, that can be piped onto a piece to create fine details and add intricate decoration before firing.
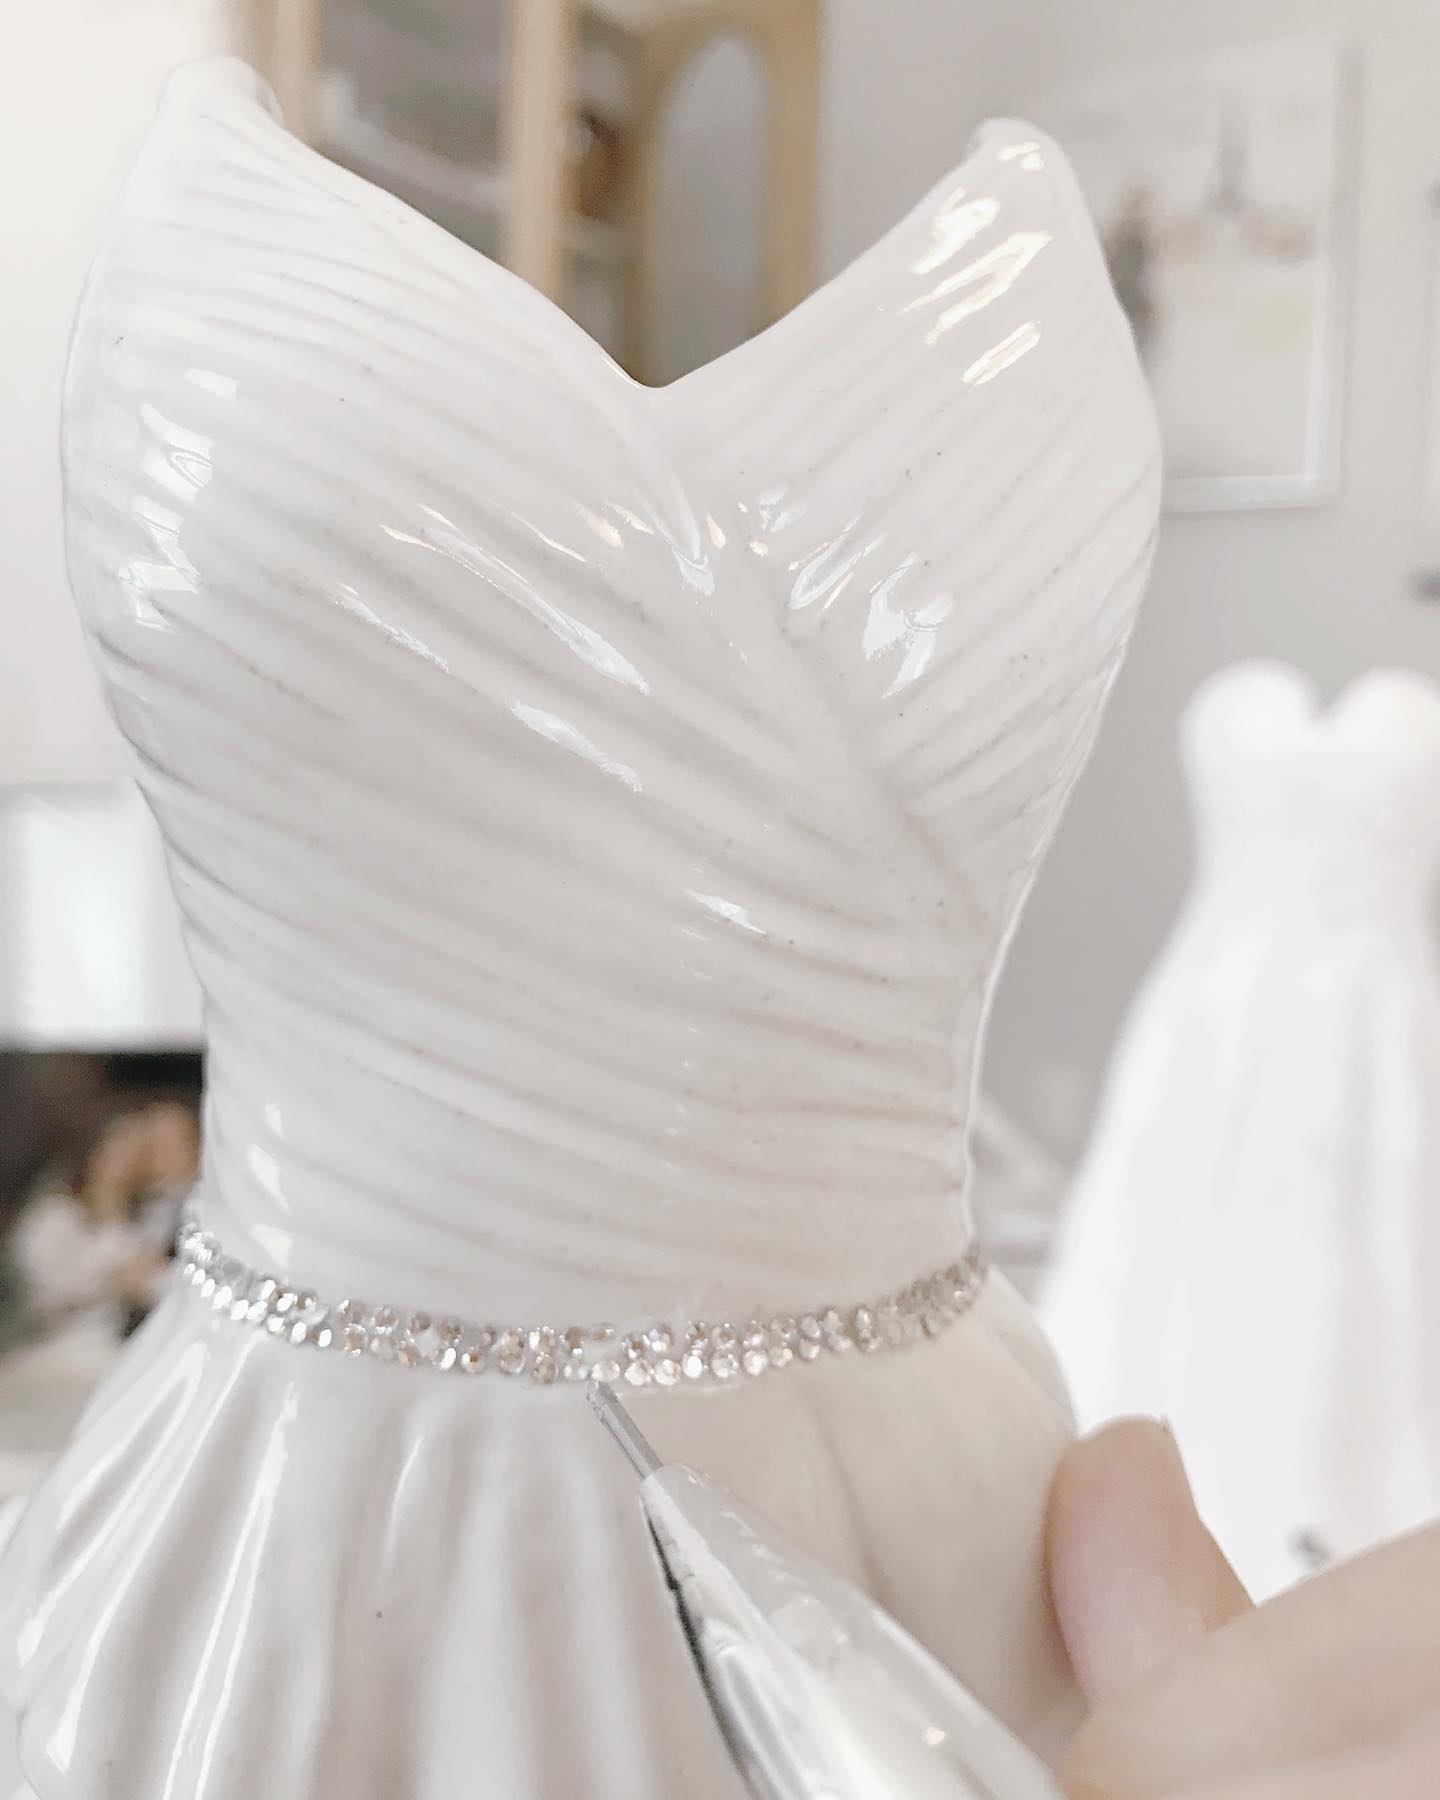
Swarovski crystals
Featured in both designer wedding gowns and StoneWear Ceramics’ replicas, Swarovski crystals represent the diamond standard of quality and luxury in the world of fashion jewelry. Through their patented manufacturing process, Swarovski designs their crystals for maximum light refraction, achieving a stunning sparkle and clarity — higher than that of glass or natural crystals, and closer to that of top-quality diamonds.
Acrylic paint
Beading, sequins, and rhinestones


Sending Her Home
Finally, it’s time for you to receive your custom StoneWear design!
Before shipping, I photograph every gown, mount the finished piece to a handcrafted wooden base, and cover each dress with a protective, handmade satin and velvet garment bag.
Ready to set your dress in stone and order your custom, StoneWear Ceramics wedding dress replica? Just fill out our request form to contact us, receive an estimate, and start your design!
For more information on our ordering process and pricing information, visit the Our Process page of our site.
Still have a few questions? Send us a message at [email protected] or give us a call!